How to Replace Ear Pads on Beats Studio Headphones? easy way 2024
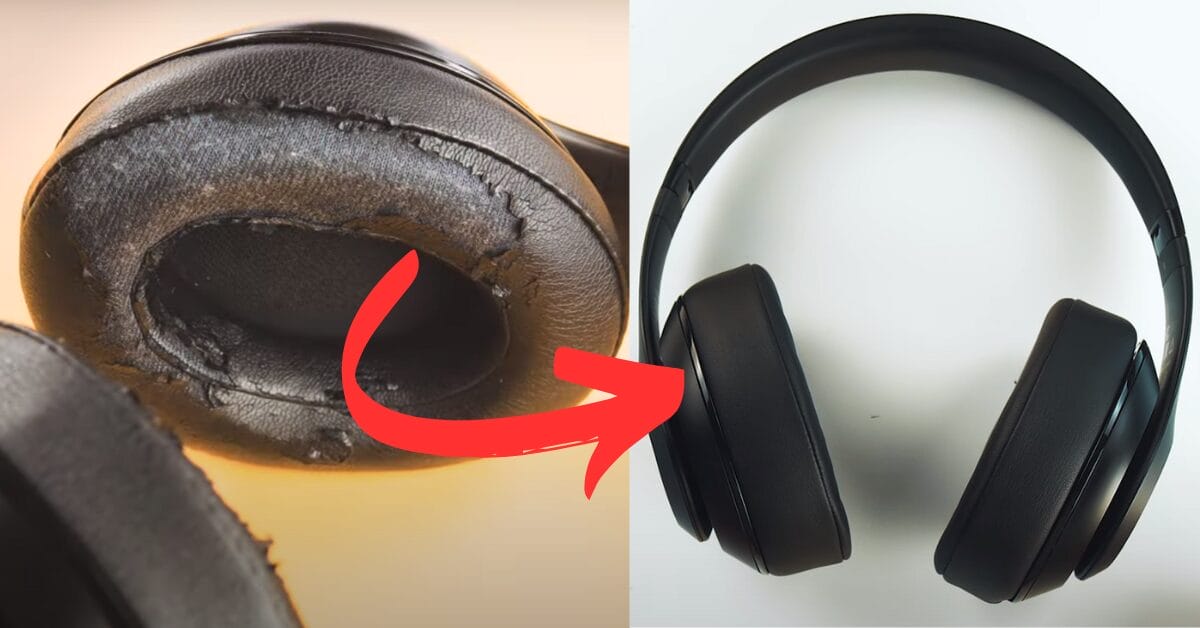
Over time, everything needs to improve the build quality of its parts. If you have used Beats Studio headphones for a long time, maybe the ear pads of your Beats Studio headphones got old. Now it’s time to replace the ear pads of your Beats Studio headphones, so learn how to replace ear pads on Beats Studio headphones.
To replace ear pads on Beats Studio headphones, you need to follow these 4 simple steps, Remove the Old Ear Pads, Clean the Headphone Surface, Apply the new adhesive, Attach the new ear pads, and that’s it. But 80% of people make some mistakes while replacing the ear pads. Here we will guide you on what the mistakes are and how to avoid them and complete this project successfully!
That’s a simple DIY project; you don’t need any expertise or experience. You can do it by following this guide within 20 minutes at home.
Table of Contents
Why Replace Ear Pads?
Ear pads get worn out from daily use, which can cause them to crack, flatten, or tear. They also collect sweat, oil, and dirt, making them dirty and unhygienic. Replacing your ear pads regularly keeps your headphones clean, more comfortable, and sounds great.
How to Replace Ear Pads on Beats Studio Headphones? Step-by-step
Tools and Materials Needed
Before you start the replacement process, make sure you have the following items on hand:
- Replacement ear pads
- small flat tool (like a spudger, flathead screwdriver, or kitchen knife)
- Adhesive remover
- Cleaning cloth
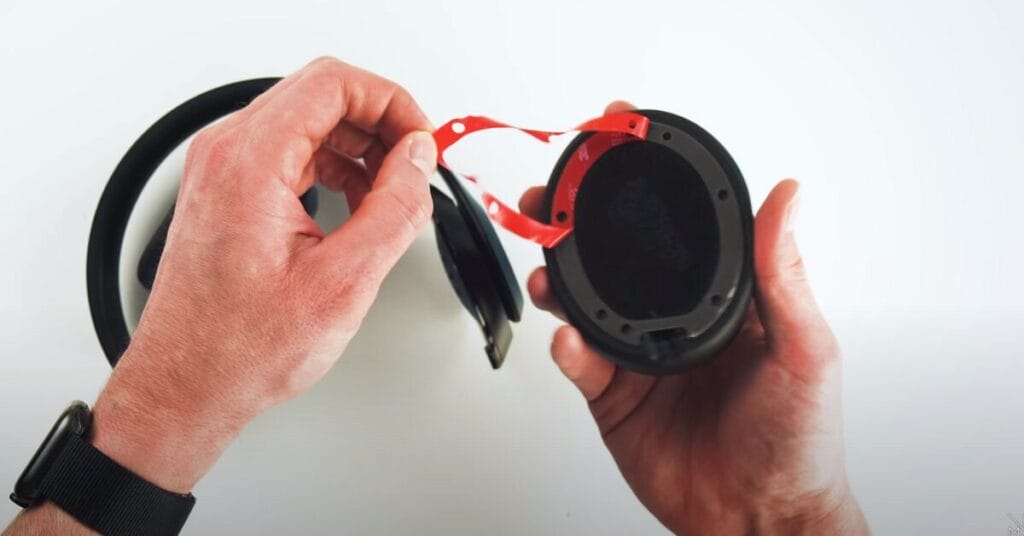
Remove the Old Ear Pads
Start by taking a small flat tool, like a thin screwdriver or a spudger. Use this tool to slowly lift and peel off the old ear pads from the ear cups of your headphones. Start slowly and carefully so you don’t break or damage any part of your headphones under the ear pads.

After you’ve taken off the old ear pads, you’ll probably see some sticky glue left on the headphones. You need to remove this glue to get the headphones ready for the new ear pads. Use your tool to scrape off the old adhesive gently, and make sure the surface is clean and smooth before moving on to the next step.
Clean the Headphone Surface
Apply adhesive remover to the area where the old ear pads were attached. This will help remove any leftover glue. It’s important to have a clean, smooth surface so the new ear pads stick well.

After using the adhesive remover, wipe it down with a cleaning cloth to remove any residue. Make sure the surface is clean and dry before you proceed to attach the new ear pads.
Apply the new adhesive (if required)
Some replacement ear pads come with adhesive pre-applied. If yours don’t, you’ll need to apply a thin layer of adhesive to the surface. Make sure to use an adhesive that’s safe for your headphones and allows for a secure attachment.
Some new ear pads already have sticky glue on them. If yours don’t, put a thin layer of glue on the headphones where the ear pads will go. Ensure the glue is safe for your headphones and will securely hold the ear pads.
Attach the New Ear Pads
Carefully line up the new ear pads with the ear cups on your headphones. Press them down firmly to make sure they stick well and there are no gaps. Hold the ear pads in place for a few minutes so the glue can set properly.
Also, watch this video to learn better
Common Mistakes to Avoid
Here are the mistakes to avoid that we told you about before
- Not Cleaning the Surface: If you don’t clean the surface well, the new ear pads might not stick properly.
- Misaligning the Ear Pads: If the ear pads are not lined up correctly, it can make your headphones uncomfortable and affect the sound quality.
- Using Excessive Force: Applying too much pressure can damage your headphones or the new ear pads.
How to choose the right replacement ear pads?
Choosing the right replacement ear pads is important. Make sure that the pads you purchase are compatible with your specific model of Beats Studio headphones. Set up a clean, well-lit workspace to prevent losing small components and to make the process smooth.
Materials: Look for high-quality materials like memory foam and soft leather for comfort and durability.
Read Reviews: Check customer reviews to see if others were satisfied with the fit and quality.
Consider Design: Some ear pads come in different colors or designs, so choose one that suits your style.
Measure Dimensions: Verify the size of the ear pads to ensure they will fit your headphones properly.
May you also like: How to Choose the Right Headphones for Your Lifestyle and Needs?
Tips for Maintaining Your New Ear Pads
To prolong the life span of your new ear pads, follow these maintenance tips:
- Clean the ear pads regularly with a damp cloth.
- Store your headphones in a case or use a headphone stand when not in use to prevent dust buildup.
- Avoid getting your headphones too wet, as this can damage the ear pads.
What are the Benefits of DIY Ear Pad replacement?
Replacing the ear pads yourself saves money because you don’t have to pay for a professional repair. You can also pick different colors or materials to make your headphones look and feel the way you want.
Any type of DIY project is good; the benefits are here.
DIY helps your headphones last longer, so you won’t need to buy a new pair as quickly. Plus, it’s a fun and easy project that gives you a sense of accomplishment.
Conclusion
Replacing the ear pads on your Beats Studio headphones is an easy and effective way to keep them comfortable and performing well. By following the steps above, you can do it yourself and enjoy the benefits of having fresh, clean ear pads. Give it a try and see how much better your headphones can feel and sound!
FAQs
How to replace ear pads on Studio Beats?
To replace ear pads on Studio Beats, use a flat tool to remove the old pads, clean the surface, apply new adhesive if needed, and then align and press the new pads in place.
Are Beats earpads replaceable?
Yes, you can replace Beats earpads. Simply purchase compatible replacement pads and follow the instructions for installation.
Why are my Beats headphones peeling?
Beats headphones may peel due to wear and tear, exposure to sweat, oils, dirt, or aging materials.
How to replace headphone ear pads?
To replace headphone ear pads, gently remove the old pads, clean the surface, and attach the new pads according to the instructions provided.